Editorial Staff
What Is a Honeynut Squash Plant and Why Gardeners Love It
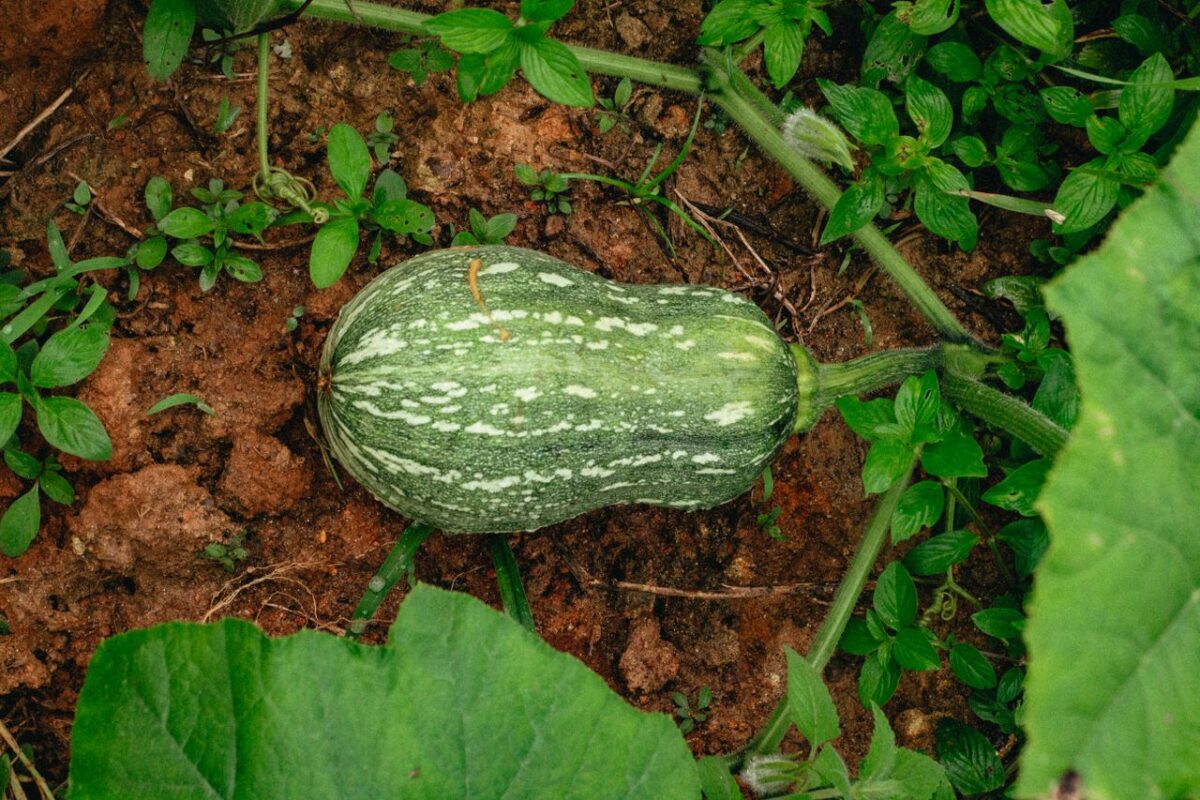
Honeynut squash is a relatively new star in the squash world, and it has quickly earned a special place in many gardeners’ plots. Botanically, it’s a type of winter squash bred as a smaller, sweeter cousin of the traditional butternut. The fruits are usually only 4–6 inches long, with smooth tan skin that deepens to a richer color as they ripen. Inside, the flesh is a deep orange, dense, and notably sweet, which is why many people describe the flavor as “butternut, but better.”
The plant itself grows as a vine, much like other winter squashes. Given full sun, warm temperatures, and well-drained soil, it will spread out and produce multiple small fruits per plant. Because the squash are compact, they are easier to handle, store, and cook than larger varieties. Many home gardeners appreciate that a single honeynut squash is often the perfect portion size for one or two people, reducing waste and making meal planning simpler.
Gardeners also value honeynut squash for its reliability and productivity. It matures relatively early for a winter squash, which is helpful in regions with shorter growing seasons. Once harvested and cured properly, the fruits store well and actually become sweeter over time. Their rich orange color hints at high beta-carotene content, adding a nutritional bonus to their culinary appeal.
In the kitchen, honeynut squash is versatile. It roasts beautifully, caramelizing at the edges and developing a concentrated sweetness that works well in both savory and sweet dishes. Gardeners who enjoy cooking find that it purées smoothly for soups, blends into sauces, and holds its shape in roasted vegetable medleys or grain bowls.
Ideal Growing Conditions for Honeynut Squash Plants
For healthy, productive plants, honeynut squash growing conditions should mimic a warm, sunny late-spring to summer environment. As a heat-loving, full sun vegetable, honeynut squash needs at least 6–8 hours of direct sunlight per day, and more is usually better. The best climate for honeynut squash is one with a warm growing season, minimal risk of frost, and daytime temperatures in the squash temperature range of about 70–85°F (21–29°C). Nighttime temperatures should stay above 55°F (13°C) for steady growth. Cold, wet weather or temperatures below 50°F (10°C) can stunt plants and slow fruit development.
Ideal soil requirements for squash include a loose, well-draining texture—such as loam or sandy loam—enriched with organic matter. Compost or well-rotted manure helps keep soil moisture even while still allowing excess water to drain away. Honeynut squash prefers slightly acidic to neutral soil; a squash pH level between 6.0 and 6.8 is generally ideal. Heavy, compacted, or waterlogged soils tend to cause root problems and reduce yields, so raised beds or mounded rows can be helpful in those conditions.
Honeynut squash performs best with consistently moist, but not soggy, soil. Typically, plants need about 1–1.5 inches of water per week from rain and irrigation combined, and sometimes more during very hot or windy periods. Deep, infrequent watering encourages strong root growth, while frequent shallow watering can leave roots closer to the surface and more vulnerable to drying out. Mulch around the plants helps maintain moisture, regulate soil temperature, and reduce weed competition, all of which support optimal honeynut squash growing conditions.
How to Plant Honeynut Squash: Seeds, Spacing, and Timing
Knowing when and how to plant honeynut squash sets you up for a strong, productive harvest. Start by checking your local frost dates: honeynut squash is a warm-season crop, so when to plant honeynut squash depends on soil and air temperatures, not the calendar alone. Wait until all danger of frost has passed and the soil has warmed to at least 60–65°F (15–18°C) for outdoor planting. In cooler climates, many gardeners gain a head start by starting squash indoors, then transplanting once conditions are right.
To start honeynut squash seeds indoors, sow them 3–4 weeks before your last expected spring frost. Use small pots or soil blocks, planting one seed per container about 1 inch deep. Provide warmth, consistent moisture, and bright light so seedlings grow stocky rather than leggy. Because squash dislikes root disturbance, transplant carefully once the soil outside is warm and nights stay reliably above 50°F (10°C).
If your growing season is long enough, direct sowing squash can be simple and effective. Plant honeynut squash seeds directly into prepared beds or hills, again about 1 inch deep, once the soil has warmed. Keep the seedbed evenly moist until seedlings emerge. Direct-sown plants often establish strong root systems because they never experience transplant shock.
Plant spacing for honeynut squash is important because these vines spread. Space individual plants 2–3 feet apart within the row, with 4–6 feet between rows, or create small mounds (hills) with 2–3 plants per hill and 3–4 feet between hills. Adequate spacing allows good airflow, easier harvesting, and fewer disease issues, and it gives each plant room to produce multiple fruits.
Thoughtful companion planting for squash can improve overall plant health and garden productivity. Honeynut squash pairs well with nitrogen-fixing beans and tall corn in a traditional “three sisters” style, where corn provides vertical structure, beans enrich the soil, and squash shades the ground to suppress weeds. Flowers such as nasturtiums and marigolds can attract beneficial insects and pollinators while helping confuse or deter some pests.
To enjoy a long harvest window, consider succession planting squash. Instead of sowing all honeynut squash seeds at once, plant a first round when conditions are ideal, then a second sowing 2–3 weeks later if your growing season allows. This staggered approach helps ensure that if early plants struggle due to unexpected weather or pests, later plantings can still provide a reliable crop and extend your harvest further into the fall.
Container and Small-Space Growing: Can You Grow Honeynut Squash in Pots?
If you garden on a balcony, patio, or in a tiny backyard, honeynut squash can still be on the menu. With the right container, support system, and variety, honeynut squash in containers can be surprisingly productive and space-efficient.
Honeynut is naturally more compact than many winter squashes, which makes it a good candidate for a patio vegetable garden. Instead of sprawling over a large bed, you can train its vines upward, growing squash vertically to save precious ground space. This is where trellising honeynut squash becomes essential: a sturdy trellis, obelisk, or even a simple A-frame made of bamboo or metal can support the vines and keep the fruit off the ground, improving airflow and reducing the risk of rot and pests.
Container size is one of the most important decisions. The best pot size for squash, including honeynut, is typically at least 15–20 gallons (about 16–20 inches wide and deep). Smaller pots tend to dry out quickly and limit root development, which can stunt growth and reduce yield. Choose containers with good drainage holes and fill them with a high-quality, well-draining potting mix rather than garden soil, which can compact in pots.
When growing honeynut squash in containers, look for compact varieties for small gardens or those specifically labeled for “container” or “bush” growth, as they produce shorter vines and can be easier to manage in tight spaces. Even vining types can work if you commit to trellising and regular training of the stems up your support structure.
With adequate sun (6–8 hours daily), consistent watering, and a balanced fertilizer, container-grown honeynut can reward you with sweet, small fruits perfect for roasting. So yes, you can absolutely grow honeynut squash in pots—and with a bit of planning around container size, vertical support, and variety selection, it can become a star of your small-space garden.
Supporting Healthy Growth: Watering, Fertilizing, and Mulching
Healthy honeynut squash plants start from the ground up, and the way you water, feed, and protect the soil has a direct impact on both plant vigor and yield. Understanding how to water honeynut squash correctly, when and how to fertilize, and how to mulch vegetable beds will go a long way toward preventing soil moisture loss and boosting squash yields.
Consistent watering is essential for honeynut squash, especially as vines begin to flower and set fruit. Aim to keep the soil evenly moist but never waterlogged. Deep, infrequent watering encourages roots to grow downward, making plants more resilient in hot, dry weather. Many gardeners find that drip irrigation for vegetables is one of the most efficient systems for squash. Drip lines or soaker hoses deliver water slowly at the soil surface, right where roots can use it, while keeping foliage dry and reducing the risk of fungal disease. Early morning is the best time to water, giving leaves time to dry and minimizing evaporation losses.
Fertilizing squash plants properly supports strong vines, abundant blossoms, and well-filled fruits. Honeynut squash is a relatively heavy feeder, so it benefits from rich soil and steady nutrition. An organic fertilizer for squash, such as well‑balanced compost, aged manure, or a granular organic blend formulated for vegetables, can be worked into the soil before planting. Once the plants are established and begin to run, a side‑dressing of compost or a light application of organic fertilizer every few weeks can keep nutrients available through the growing season. Take care not to overdo high‑nitrogen products; excessive nitrogen can produce lush leaves at the expense of fruit set.
Mulching vegetable beds is another key practice in supporting healthy honeynut squash growth. A generous layer of organic mulch—such as clean straw, shredded leaves, or untreated grass clippings—around the base of plants helps in several ways. First, it is one of the most effective methods for preventing soil moisture loss, acting like a protective blanket that slows evaporation and keeps soil temperatures more stable. Second, mulch suppresses weed growth, so the squash roots don’t have to compete for water and nutrients. Third, it creates a cleaner, drier surface for developing fruits, reducing the risk of rot and pest damage where squash sits directly on bare soil.
Pruning, Training, and Trellising Honeynut Squash Vines
Pruning, training, and trellising Honeynut squash vines are key steps in keeping plants healthy, productive, and manageable, especially in smaller spaces. By using simple vertical gardening techniques and paying attention to vine growth, you can support heavy fruits, improve air circulation, and make harvesting easier.
Start by training squash vines early, when they are still flexible and easy to guide. As the main vine grows, gently weave it through a trellis, cattle panel, or sturdy netting, or tie it loosely to vertical supports with soft garden ties or strips of fabric. Directing the vine upward rather than letting it sprawl across the ground saves space and keeps leaves and fruits off damp soil, which can reduce rot and disease issues.
Pruning Honeynut squash is mostly about managing vine length and removing excess growth that doesn’t contribute to fruit production. Once you have the number of developing fruits you want on the main vine, you can pinch or cut the tip of that vine to stop it from running farther. This helps the plant focus its energy on sizing up existing squash instead of producing more flowers and foliage. Side shoots (lateral vines) can also be thinned: keep the strongest ones and remove weak, crowded, or tangled shoots to prevent the plant from becoming a dense mass of leaves.
As fruits develop on trellised vines, supporting heavy fruits becomes important. Although Honeynut squash are smaller than traditional butternuts, they still gain weight as they ripen, which can strain vines. Use slings made from old T-shirts, produce bags, or stretchy fabric to cradle each fruit and tie the sling to the trellis. This takes the load off the vine and reduces the risk of stems snapping in wind or under their own weight.
Throughout the season, keep an eye on foliage density and airflow. Improving air circulation is a simple but powerful way to discourage powdery mildew and other fungal problems that commonly affect squash. Remove yellowing, diseased, or heavily shaded leaves, especially those close to the soil. Prune selectively so the plant still retains plenty of healthy foliage for photosynthesis while opening up the interior of the vine structure to light and air.
Common Pests and Diseases Affecting Honeynut Squash Plants
Honeynut squash plants are generally vigorous, but several key pests and diseases can quickly limit yields if they’re not managed early and thoughtfully. Understanding the most common honeynut squash pests and problems—and how to address them using organic pest control for squash and broader integrated pest management (IPM) strategies—will help keep your plants healthy from seedling to harvest.
Squash bugs are another frequent threat. They suck sap from leaves and stems, leading to yellowing, wilting, and reduced plant vigor. Squash bug prevention focuses on disrupting their life cycle: check the undersides of leaves for clusters of bronze eggs and crush them, remove plant debris where adults overwinter, and use trap boards or shingles placed on the soil to collect and destroy hiding bugs each morning. Companion planting and encouraging natural predators, such as spiders and ground beetles, also support long-term balance.
Among diseases, powdery mildew on squash is especially common late in the season. It appears as white, powdery spots on leaves and can slow growth and reduce fruit quality if it spreads unchecked. Good airflow, proper spacing, and watering at the base of plants rather than overhead help prevent powdery mildew from taking hold. Organic options like sulfur or potassium bicarbonate sprays, used at the first sign of infection, can limit its spread. Rotating crops and removing infected foliage at the end of the season further reduce disease pressure in future plantings.
Planting disease-resistant squash varieties is another powerful tool. While no plant is completely immune, many modern honeynut-type and related winter squash cultivars have improved resistance to common fungal diseases. Pairing these varieties with healthy soil, adequate nutrition, and crop rotation strengthens the plant’s natural defenses and lowers the need for intervention.
All of these tactics come together in an integrated pest management approach. Instead of relying on a single product or reactionary treatment, integrated pest management emphasizes prevention, regular monitoring, accurate identification of honeynut squash pests and diseases, and the least-disruptive controls first. This might mean combining row covers, hand-picking insects, using organic sprays only when thresholds are reached, and continually improving soil and cultural practices. With this holistic mindset, you can protect honeynut squash plants effectively while maintaining a resilient, ecologically balanced garden.
How Long Does It Take to Grow a Honeynut Squash Plant? Growth Stages and Timeline
Honeynut squash days to maturity typically range from about 95 to 110 days from transplanting, depending on the variety, climate, and growing conditions. Within that window, the plant moves through several clear squash growth stages: germination, vegetative growth and vining, flowering, fruit development, and final ripening.
The germination time for squash is usually fast under warm conditions. When soil temperatures are consistently around 70–90°F (21–32°C), seeds can sprout in about 5–10 days. Cooler soil can slow or even prevent germination, so waiting for warm soil or using indoor starts can help you stay on schedule.
Once the seedlings emerge, the vegetative stage begins. During this phase, honeynut plants produce true leaves, then begin to vine and spread. This period generally lasts 3–4 weeks, as the plant focuses on building a strong root system and healthy foliage. Good sun, regular moisture, and balanced nutrition at this stage are important, because a vigorous plant is more likely to flower and set fruit reliably later on.
Next comes the flowering time. Honeynut squash, like other winter squash, produces separate male and female flowers. Male flowers usually appear first, often around 30–40 days after planting, followed by female flowers a bit later. The female flowers have a tiny, swollen bulge (the immature fruit) at their base. Successful pollination—usually by bees or other pollinators—is essential for that bulge to grow into a full-sized squash. If pollination conditions are poor, some early fruit may not develop and will drop off, slightly extending the effective timeline.
Once pollinated, the fruit development stage begins. From pollination to a harvestable honeynut, you can expect roughly 40–50 days of growth. During this time, the squash will rapidly increase in size, then gradually change color as the rind thickens and the sugars concentrate. Adequate water and nutrients during fruit development help produce dense, sweet flesh and good storage quality.
Knowing when honeynut squash is ready is key to getting the best flavor. Rather than relying only on the calendar, look for visual and physical cues. Mature honeynut fruits turn from green to a rich tan or deep buff color, sometimes with a slightly dull rather than glossy finish. The rind should be firm and difficult to pierce with a fingernail. Another reliable sign is the condition of the stem: when the plant is nearing maturity, the stem that attaches the fruit to the vine often becomes dry, corky, and begins to brown. At this point, the internal sugars are usually well developed, and the squash is ready to harvest.
When you put all of these stages together, the planting to harvest timeline for honeynut squash, from sowing seeds in warm soil to picking ripe, flavorful fruit, normally spans about 3 to 4 months. By paying attention to each phase—germination time for squash, the vigor of the vines, the flowering time, and the progression of fruit development—you can better predict harvest, adjust care as needed, and enjoy honeynuts at peak quality.
Saving Seeds and Planning Next Year’s Honeynut Squash Crop
Saving seeds from your honeynut squash and planning next year’s crop go hand in hand. Done thoughtfully, you can improve yields over time, adapt the plants to your garden’s conditions, and save money on seed purchases.
First, understand what kind of honeynut you’re growing. Most honeynut squash on the market are hybrids, bred from specific parent lines for flavor, size, and earliness. With hybrid squash, the seeds you save will not reliably grow “true to type” next year; they may revert to a mix of traits from their parents. If your goal is consistent, predictable fruit, it’s better to purchase fresh hybrid seed each season. If you want to experiment, you can still save hybrid seeds, but treat it as a breeding project and expect variation. In contrast, open-pollinated squash varieties will produce offspring very similar to the parent plant, making them ideal for long-term honeynut squash seeds saving. If you can find an open-pollinated “honeynut-style” squash, that’s your best option for stable, reliable seed saving.
When collecting squash seeds, choose your best, healthiest fruits from your strongest plants. Let the squash fully mature on the vine until the skins are hard and the color is deep and rich; this ensures maximum seed viability. After harvesting, allow the fruits to cure for a couple of weeks in a warm, dry place. When you’re ready, cut the squash open, scoop out the seed cavity, and separate the seeds from the stringy pulp. Rinse the seeds in cool water, rubbing gently to remove residue. Spread them in a single layer on a plate, tray, or screen in a well-ventilated, shaded spot. Stir them once a day until they are fully dry; this often takes about a week. Properly dried squash seeds, stored in a cool, dark, and dry place in an airtight container, can remain viable for several years.
As you think about planning the vegetable garden for next season, crop rotation for squash is essential. Squash are heavy feeders and are prone to soil-borne diseases and pests like squash vine borers and squash bugs. Rotating your honeynut squash to a different bed each year—ideally on a three- to four-year cycle away from other cucurbits (squash, pumpkins, cucumbers, melons)—helps disrupt pest and disease build-up in the soil. Planting squash after fertility-building crops such as legumes, or after well-composted beds, can support healthier vines and better fruit set.
Improving yields over time comes from observing, adjusting, and being patient. Each season, take notes: which plants produced the best-tasting honeynuts, which resisted powdery mildew, which set fruit earliest. Use that information to guide which fruits you save seeds from, which areas of the garden you dedicate to squash, and how you adjust watering, mulching, and feeding. Whether you stick to purchased hybrid seed or move toward open-pollinated honeynut types, a thoughtful cycle of seed saving, careful selection, and smart garden planning will gradually give you more resilient plants and more abundant, flavorful harvests.